


Flipping through an air compressor owner’s manual, you will notice pages of preventive maintenance checks and troubleshooting tips, as well as caution notices for operator safety. Unfortunately, many don’t take the time to read—or even think about—the simple things that can help them get the best return on their equipment investment.
All those manual pages aren’t just a load of hot air. Even small, day-to-day tasks can make a difference in the life and repair cost of an air compressor. Nonetheless, preventive maintenance can be easily overlooked during the hustle of the workday. In the rental industry, where equipment often withstands some of the harshest use, a compressor can last longer than one used on a construction site. This seems contradictory since renters take little “ownership” in equipment they only need for a short period of time. The key difference comes in the rental center’s preventive maintenance. Before each compressor goes out, rental centers typically do a run-through of the maintenance checks to ensure the unit isn’t returned nonfunctional within the hour, resulting in a lost day’s rental.
These checks only take a few minutes, but they can add months—or even years—to the service life of a machine. First, always begin with a clean compressor. While clean equipment looks better, it also will help improve maintenance because it will make it easier to detect leaks and broken or loose components. Next, move into the following preventive maintenance checks to help keep a compressor running strong for years to come.
Daily Maintenance
While a number of things should be checked before each compressor use, these daily maintenance tasks are among the quickest and easiest to perform. For starters, check the hoses for kinks, inspect the electrical wiring for cuts and fraying and examine the tubing and piping for damage. Ensure the connections in all of those areas are tight, and also tighten any loose nuts or bolts. Look over the controls, gauges, accessories and instruments, making certain there are no loose mountings or damage.
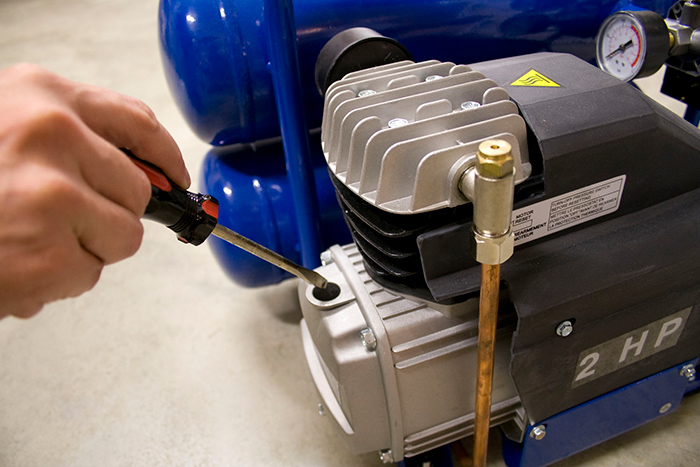
Begin each day’s use by checking the pump oil level. Disconnect the power source and place the compressor on a flat surface. Remove the oil fill plug and check the level, then insert a screwdriver into the crankcase. Inspect the oil on the screwdriver for signs of contaminants, such as water and dirt, and change the oil if any contamination is found. Otherwise, change the oil annually. If a gas engine powers the compressor, use this time to check the engine oil level, as well, which also should be changed annually. Be sure to install the correct type of air filter for the day’s work. Using the wrong type of filter, or failing to use one at all, could bring on operating problems. A standard filter will trap dust particles based upon micron size, while a coalescing filter will remove water and oil from the air.
For some applications, such as spraying paint, an air dryer should be used with the coalescing filter so that all moisture is removed from the lines. On the other hand, some tools function better with some moisture. When using a nail gun, for instance, an operator may want to add oil to the line with a lubricator. Once starting the compressor, be aware of any unusual noises or vibrations, which would indicate a potential problem. Knocking or vibrating could indicate a worn connecting rod or piston pin, dirt on the piston or a loose flywheel or pulley. Chatter at the pressure switch or magnetic starter may indicate the switch needs to be adjusted or replaced.
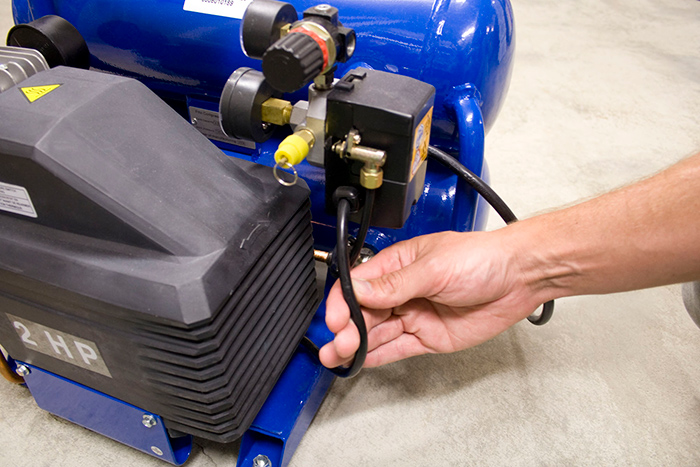
Any noise out of the ordinary typically indicates that something is wrong. At the end of each day, if not more frequently, drain condensation from the air tanks. As always, begin by disconnecting the power source. If the unit is portable, move it into an inclined position with the drain at the lowest point. Slowly open the drain and bleed the air from the tank(s). When the pressure drops to 10 psi, the valves can be fully opened and the tank(s) drained. Keep in mind that the condensate may contain oil, so it should be collected and disposed of properly.
Compressors operating in high-humidity areas will need to be drained more frequently than those in dryer climates. Moist air also can take a toll on a compressor’s longevity if the situation isn’t appropriately addressed. Humidity may cause moisture to form in the pump and produce sludge in the lubricant, which will cause premature wear on the parts. When moisture begins to cause problems, an operator will typically notice that the lubricant looks milky or that condensation forms on the outside of the pump as it cools. The effects of humidity can be diminished by frequently draining the air tank and avoiding unheated storage areas since excessive moisture can build when moving a unit between temperature extremes. Increasing ventilation or operating the compressor for longer intervals also may help prevent moisture from forming in the pump.
Not So Often
While a number of small maintenance tasks should be done daily, several other—while still important—can be performed less often. For instance, the air filter should be inspected about once each week. Tap the dirt off and hold it up to a light. Are there bright spots of light coming through puncture holes in the filter? An exceptionally dirty filter should be replaced, as well, since it could wreak havoc on a compressor, costing much more in repair costs and time lost than an inexpensive filter replacement would cost. Keep in mind that compressors used in dusty environments will likely need filter replacements more often than a manual recommends. If there’s ever any question about whether a filter needs to be changed, just replace it.
On a monthly basis, take time to check the safety relief valve. With the tanks emptied and the power source disconnected, pull and release the valve a few times. The plunger should move in and out. If it fails to do so after a few pulls—which should be enough to dislodge any dirt that might be causing the problem—the valve will leak and not actuate. A defective safety relief valve can often be detected when it “pops” or relieves pressure. Replace it with a new ASME-certified safety relief valve. Air connections and compressor joints also should be checked monthly for leaks, which could cause a number of problems. Begin by bringing the unit up to pressure, and then rub soapy water around all of the joints, fittings and hose connections. Air bubbles will form at the site of any leaks. Bleed off all of the air before tightening or replacing any parts. Inspect the compressor’s drive belt tension monthly. With the power supply disconnected and the control switches turned off, use a belt tension gauge attached between the motor and compressor sheaves to get a reading.
Compare the reading to the compressor’s service manual. If the belt’s deflection is too great, loosen the bolts on the power source and slide the motor or engine away from the pump. Do the reverse if the deflection is too small. Recheck the tension after any adjustment is made. End the monthly maintenance routine by checking all of the unit’s bolts and tightening them as necessary.
Troubleshooting
Should a compressor experience a maintenance problem, the symptoms will likely provide clues regarding what went wrong. For instance, if the compressor is not producing enough air, it may be due to a leaky or dirty valve that needs to be tightened, cleaned or replaced. Other dirty or loose components also may trigger a lack of air, including the piston, piston rings, cylinder, inlet filter and discharge line filter. Or, the culprit may be a lubricant viscosity that is too high. A high lubricant viscosity might prevent the compressor from coming up to speed fast enough—or at all. Carbon buildup on the piston or a defective motor part, gasket or valve also could cause this, as could a worn connecting rod, piston pin, crank wrist pin bearing, crankshaft or crankshaft seal. High oil consumption is another potential problem an operator may experience. This could be caused by a light-duty cycle, damaged piston rings or excessive end gap, or a plugged oil crankcase vent.
If the compressor becomes excessively hot, check the inlet filter and discharge line filter for dirt and ensure the lubricant level and type are correct. A number of other symptoms can cause either problem—oil consumption or heat—such as a low lubricant viscosity, an uneven surface or a worn cylinder, piston, connecting rod, piston pin, crank wrist pin bearing, crankshaft seal, crankshaft or cylinder. To fix many of these problems, it’s typically a matter of cleaning, or possibly replacing, the affected part. Soapy water and a wire brush can be used to clean most parts. Avoid using a wire brush on softer parts, including anything made with brass or Teflon. Burnt on oil and carbon buildup may require Stoddard solvent. Worn parts, such as a scored cylinder or piston, will need to be replaced. If the problem is caused by the lubricant, such as contamination or the wrong viscosity, change the oil. Inadequate lubricant levels, or using the wrong type, might cause excessive noise during operation. While neglecting the air filter and lubrication system tend to cause the most problems, there’s always a chance of a compressor needing some extra care. Any compressor that’s well taken care of shouldn’t require any adjustments, but many compressors tend to be used and abused nonetheless. If the unit overpressurizes or fails to provide enough pressure, the problem could be with the pilot valve cut-out pressure adjustment. Begin by cleaning any dirt from the valve seat, then adjust the valve according to manufacturer specifications, which are often available online.
Typically, this involves turning the outermost screw on the pilot valve clockwise to increase the cut-out pressure limit—the point at which the pressure stops building—or counter-clockwise to decrease it. Never turn the screw more than one revolution; it could cause the screw to burst out due to the tank pressure. Additionally, be cautious to never adjust the cut-out pressure to a level higher than the maximum recommended setting. This will cause the motor to draw excessive amps and potentially damage the motor and electrical system. Besides, the time spent on a compressor should be used to maintain or improve performance, not damage it. To change the point at which the compressor cuts in, or comes on, when system pressure begins decreasing, adjust the pressure differential screw similarly. Despite the ease of this adjustment, it’s rarely necessary. The pressure switch is set by the manufacturer, but there are some cases in which an operator may benefit from adjusting it to a lower pressure range.
If the compressor is being used with air tools that all require a maximum pressure of only 90 psi or less—and the compressor normally kicks in at 105 psi and shuts down at 125 psi—the pressure can be lowered to an 80 to 100 range, which will still provide adequate pressure yet will reduce wear on the machine. The pressure range can be adjusted while the compressor is running by turning the pressure range screw clockwise to increase overall system pressure, or counter-clockwise to decrease it. In the end, just a few minutes a day and some monthly preventive maintenance checks could make a big impact on a compressor’s service life and the ROI. In fact, following the manufacturer’s guidance just might cause any potential compressor problems to virtually vanish into thin air. Visit Jenny.
![]()